Beacon Placement Best Practices - Hospitality
Overview
Relay's location beacons are designed specifically to work with your Relays in order to provide indoor location information for your day-to-day operations and during emergency incidents. Installing your location beacons is required before your Relay system will be able to report any indoor location information and be ready to function as your panic solution.
Beacon range varies depending on which size beacon you have. We offer standard, and XL beacons. A standard beacon will range 25-50 feet, and an. XL will typically range 70 feet. Range depends on barriers such as walls, furniture, equipment, or people. The placement of your location beacons will vary based on many factors including your building’s layout, size, construction materials, etc.
Relay logo (if using standard beacons) or grey power button (if using XL beacons) facing towards the room
Not behind significant barriers, such as a thick wall or metal
In a dry area
Avoid placing a beacon:
Under a bed facing downwards
Behind a metal structure
In guest room bathrooms, unless it is a common-area bathroom where location tracking is required
On movable furniture that might get shifted to another guest room
Beacon Orientation
- Beacons must be oriented a specific way for an accurate signal projection. For more information on how to orient a beacon, reference this article.
Guest Rooms
Standard Guest Rooms
 💡 Regardless of the setup placement, each room should have a consistent beacon placement to ensure accurate locations in each room.
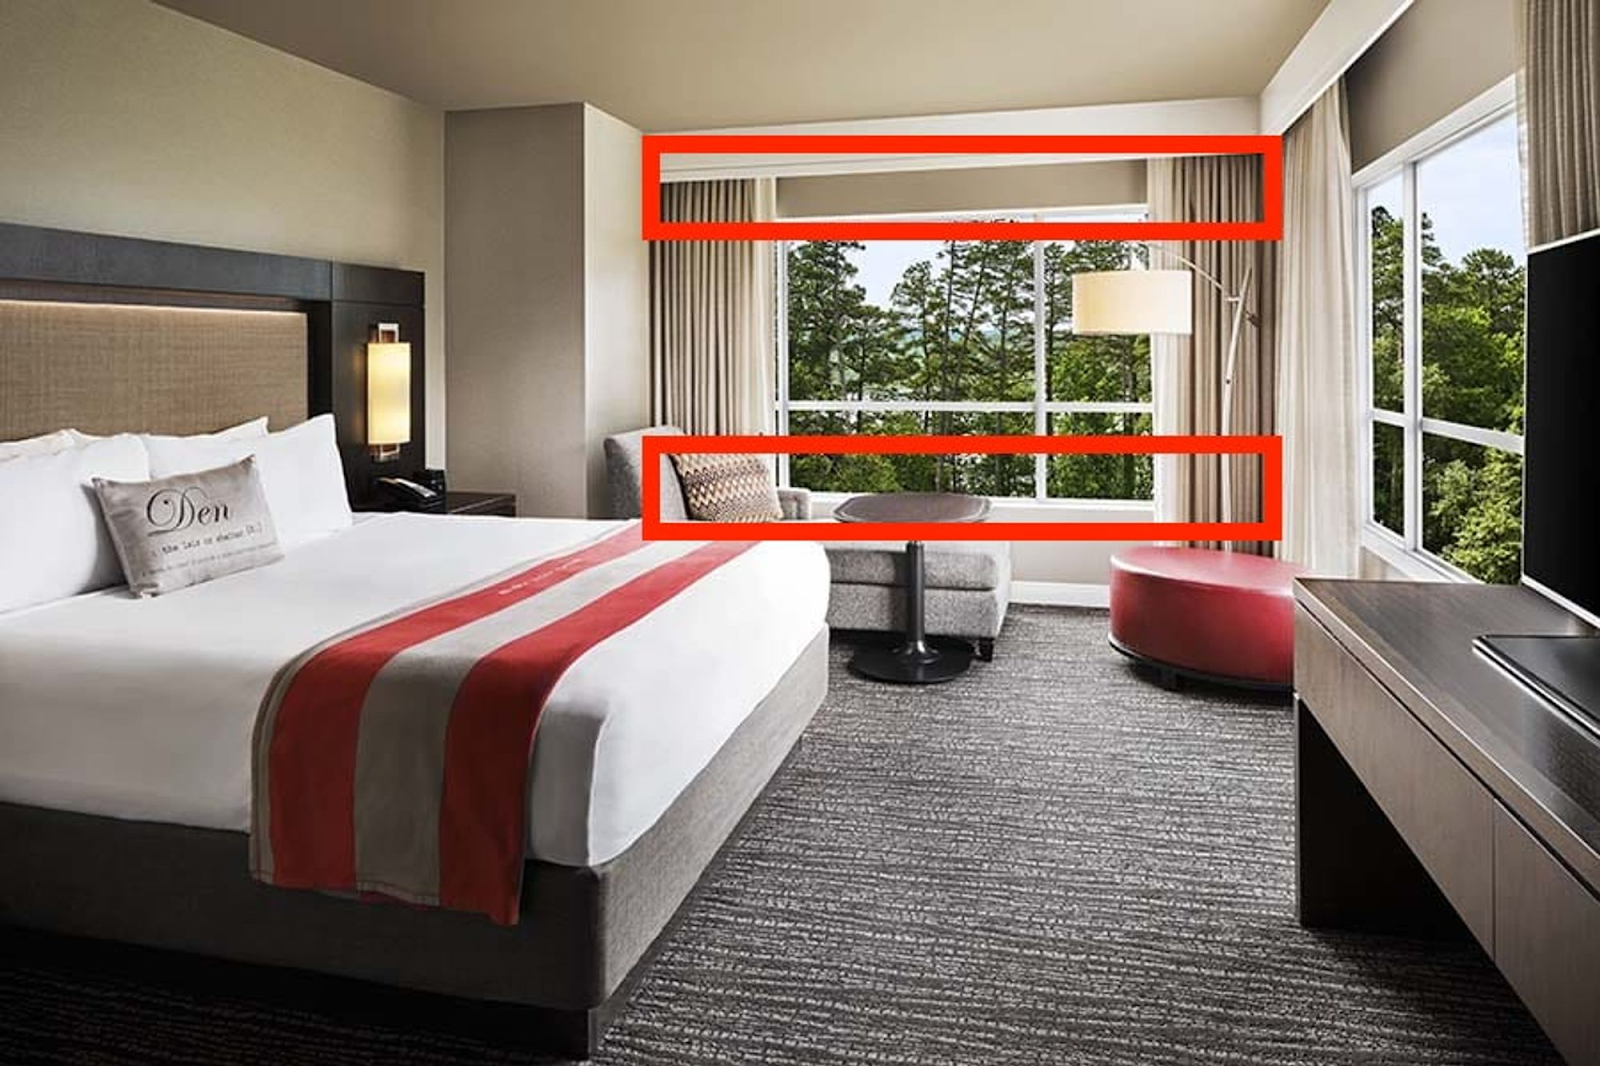
Recommendation #1 - On the window sill
Place a beacon on the window sill with the Relay logo (if standard beacon) or grey power button (if XL beacon) facing outwards into the room. This will ensure the beacon projects the strongest signal into the guest room. If possible, place the beacon vertically-central rather than on the ceiling or floor. If hiding the beacon is desired, behind a window valence is often a great option.
Recommendation #2 - Central location in the room
If it’s not possible to place a beacon on the exterior wall, the next best spot will be a location central to the room. Somewhere the beacon can be placed with the Relay logo facing outwards into the majority of the room is preferred. Such locations may include above the closet door frame or behind the television.
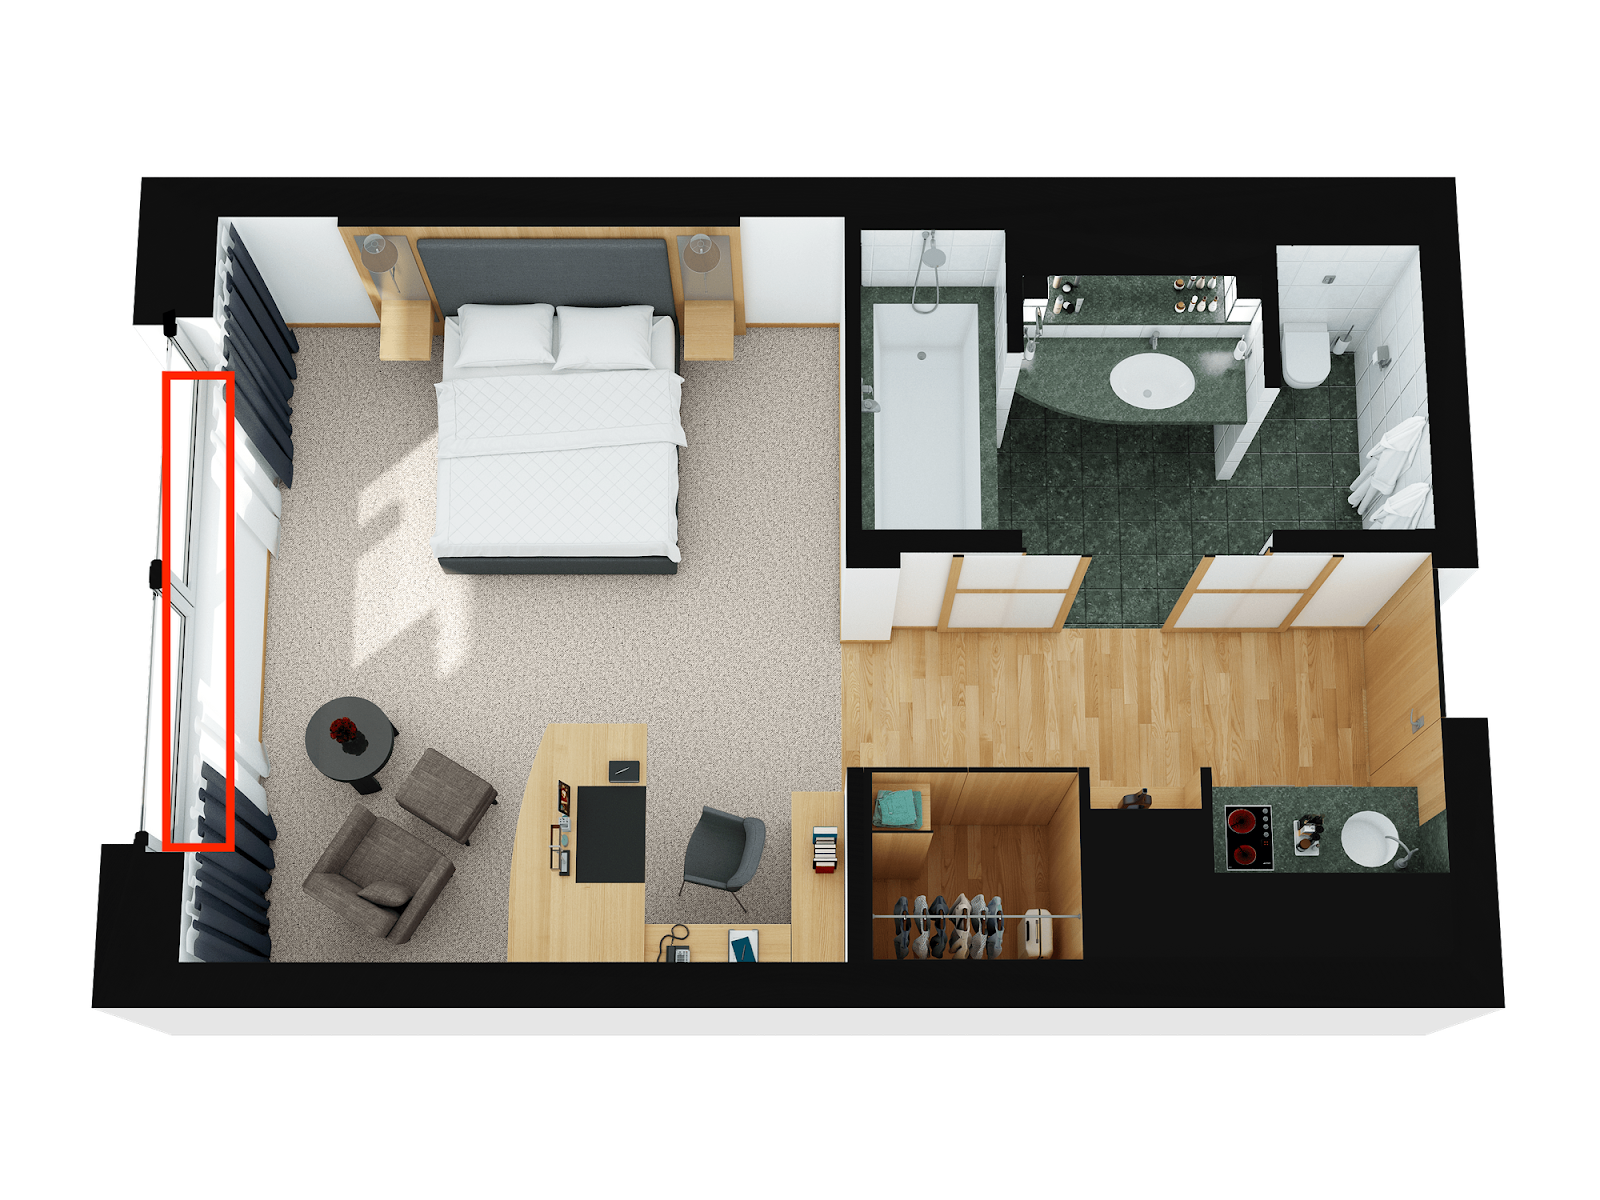
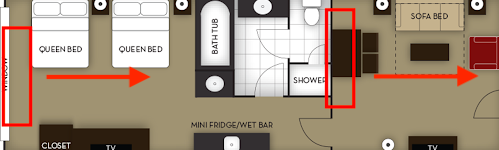
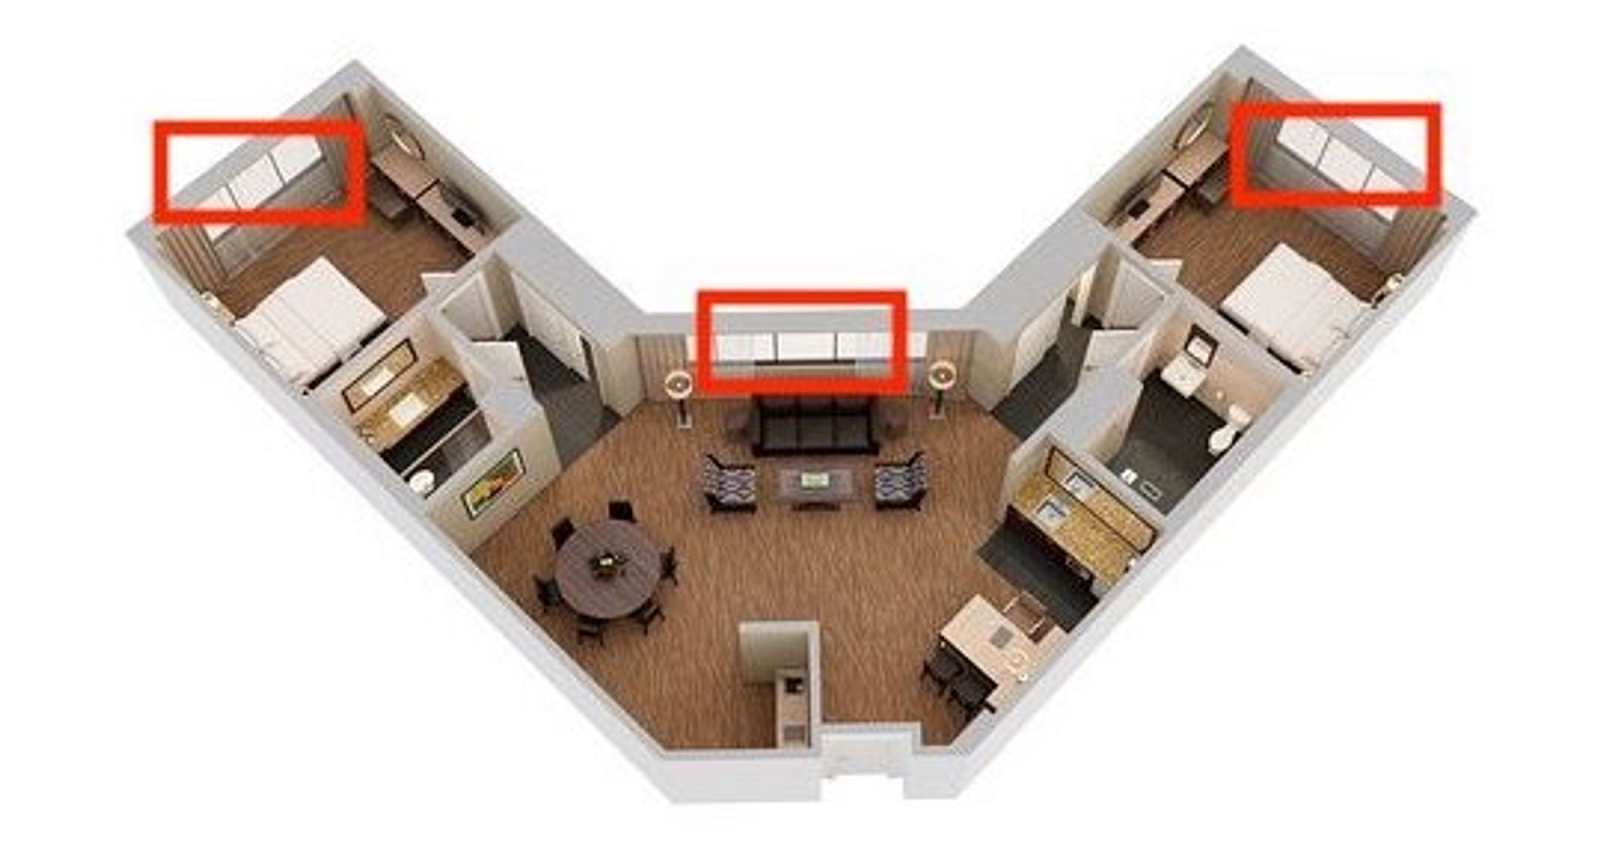
Suites
Suites with multiple rooms will require a beacon placed in each main room with the Relay logo facing the center of the area where it is placed.
Two Room Example
Three Room Example
Common Areas
Hallways, Stairwells, and Elevator Lobbies
- Hallways: Place one beacon at each end of the hallway and every 50ft (for standard beacons), or every 70 feet (for XL beacons).
- In general for standard beacons this ends up being about one beacon every 8 rooms for hallways with rooms on each side, or one beacon every 4 rooms for hallways with only one side of rooms. For XL beacons, this ends up being about one beacon every 16 rooms for hallways with rooms on each side, or one beacon every 8 rooms for hallways with only one side of rooms.
- Stairwells: Place one beacon on each individual stairwell landing.
- Elevator lobbies: Place one beacon in each elevator lobby.
- Note: A guest lobby and service elevator will require separate beacons.
Main Lobby & Front Desk
- Front Desk: Place one beacon behind the front desk.
- Main Lobby: Place one beacon every 25 - 50 feet (for standard beacons) or 70 feet (for XL beacons) throughout the lobby. If there are significant barriers or if the lobby turns corners, additional beacons will need to be placed to cover these areas beyond the standard 25 feet (for standard beacons) or every 70 feet (for XL beacons).
Public Rooms: Conference Rooms, Ballrooms, Fitness Center, Spa
- Small rooms (smaller than 20’x20’): Place a beacon centrally in the room.
- Medium rooms (up to 25’x40’ or 30’x30):
- Standard beacons: If the room is square or rectangular, completely open, and allows the beacon to be placed in the center you may place one beacon centrally. If these conditions can’t all can't be met, two beacons will be needed, likely on opposite walls facing inwards towards the center of the room.
- XL beacons: Place one beacon centrally
- Large rooms (greater than 25’x40’ or 30’x30’):
- Standard beacons: Place beacons roughly every 25 feet throughout the room.
- XL beacons: Place beacons roughly every 70 feet throughout the room.
Common Area Restrooms
- Small restrooms: Place one beacon under each restroom sink.
- Large restrooms: Place one beacon in each main section of the bathroom (for example, if there is a dividing wall between the stalls and sinks).
Restaurant & Bar
- Small restaurants: (2-10 tables) or cafes may have one beacon centrally located.
- Larger restaurants:
- Standard beacons: Place one beacon every 25 feet with the Relay logo facing towards the room.
- XL Beacons: Place one beacon every 70 feet with the Relay logo facing toward the room.
Outdoor Areas
- Pool Area: Place one beacon every 25 feet (standard beacons) or 70 feet (XL beacons) in the pool area.
- Valet Area: Place one beacon at the valet desk.
- Loading Dock: Place one beacon in a small loading dock or one beacon every 25 feet (standard beacons) or 70 feet (XL beacons) for larger docks.
- Parking Deck: If you would like location coverage in these areas and the wifi or cell connectivity is good, you may place beacons throughout the parking deck.
- Note: Beacons in the parking decks are optional; the ‘full deployment’ coverage will not include parking decks unless specifically needed.
Employee Areas
Back of House Offices
Back of House Offices should contain one beacon for each office and an additional beacon in hallways roughly every 25 feet (for standard beacons) or every 70 feet (for XL beacons). If an office contains significant barriers such as walls or is larger than 25’x40’, an additional beacon should be placed roughly every 25 feet (for standard beacons) or every 70 feet (for XL beacons).
Kitchen
- Small kitchen (smaller than 20’x20’): One beacon centrally located on a wall and not directly on or near cooking equipment.
- Large kitchen: One beacon every 25 feet (for standard beacons) or every 70 feet (for XL beacons). In most cases, one beacon on each major wall should suffice.
Additional information
After set up, beacons may report as “No Pings” until you fully roll out Relay. If a Relay Device hasn’t visited a specific location, it will read as No Ping despite a beacon being placed correctly. To test a specific beacon, walk to the room with a Relay Device and open the Relay Pro App. Navigate to Location, and check to see if the Relay device you are using updated accurately.
For information on how to install beacons, reference this article
For information on how to configure floorplans in Dash, reference this article
Related Articles
Beacon Configuration and Installation
Note: This article only applies to Relay accounts utilizing our Indoor Location Services Overview Relay's location beacons are designed specifically to work with your Relays in order to provide indoor location information for your day-to-day ...Panic and Incident Test Best Practices
Objective To better understand how to do panic and incident testing when setting up Relay Environment / Applies To Relay Dash Relay Pro App Relay Devices Before the Test Ensure that all employees using the Relay App have the correct settings on their ...How to Troubleshoot a Beacon
Objective To better understand how to troubleshoot location beacons Environment / Applies To Plans with Indoor Location The Relay Pro App Relay Device Location Beacons Procedure Room Verification Room Verification can be used to verify a relay device ...What do the Beacon Statuses Mean?
Environment / Applies To Accounts with Indoor Location tracking Relay Dash Answer Low Battery - If a beacon's battery level drops below 15%, it will show as having low battery. We recommend replacing the AA batteries inside of any standard beacon ...How to Place and Orient Location Beacons
Objective Placement best practices for the Location Beacons Environment/Applies To a Relay Dash Relay Pro App Accounts with Indoor Location Location Beacons Procedure In general, a beacon should be placed in the following manner: Relay logo (for ...